
Hi welcome to this freshly new Inkscape Tutorial. This time we are going to create a Surprisingly beautiful Gift Box and as you would see despite it may look simple but it is tricky to create it. It took a lot of time to break it down to a tutorial. You can use this box to create a beautiful wallpaper for you Pc or Phone or you can use it anywhere you want. I have tried to keep the word count as low and understandable as possible to reduce the amount of theory. Obviously we want the fun of creating.
So lets begin.
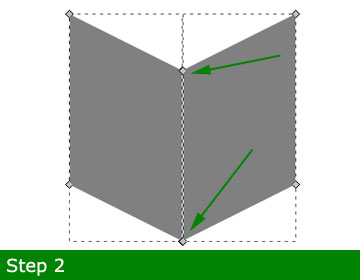
Both then converted to Object > Object to Path. Now select the middle nodes of both of them and move downwards. We are trying to create a simple 3D box.
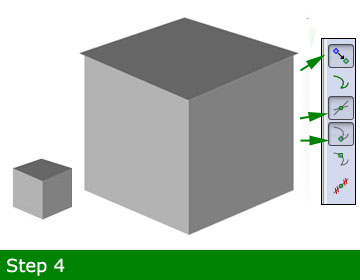
A new shape created at the top clicking directly on nodes of the box wall objects. You can enable Node snapping (Shown in image)to make it easier to do. We have made it a little bit bigger to create the box cover.
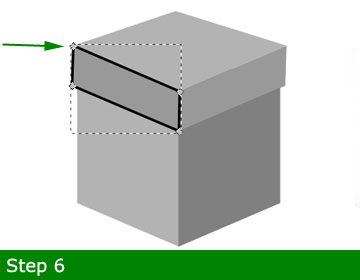
Leave the Node snapping enabled and create the box cover sides. In this image the black stroke is displayed black to identify the real shape. We will remove the stroke in the next step.
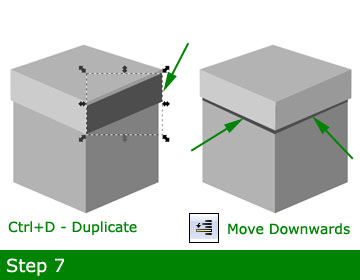
Now the cover side wall is Duplicated Ctrl+D and filled with a dark gray color. We then moved it little bit downwards and then under the box cover to create the box cover shadow effect. Use the Move Object one step downwards button shown in image to do this.
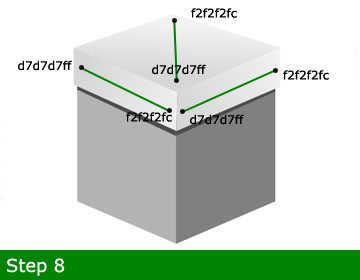
To Fill gradient in box cover you can use the color values and the direction of linear gradients as shown.
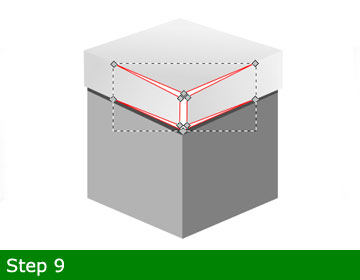
Lets create a shape at the corner of box cover. This will help the box cover appear as a hardobject. The red strokes are just to define the flow of the shape and will be removed later.
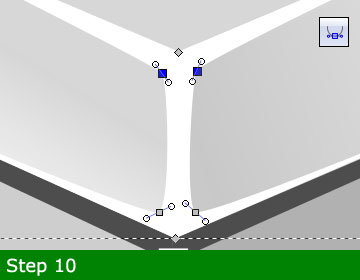
A zoomed view of the shape. We converted the inner 4 nodes to symmetric and moved the handles as shown to create a curve.
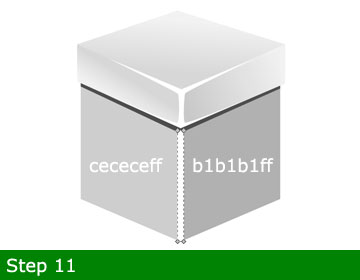
Here is the overall look of the Box cover. A simple white rectangle shape is also added in the middle of the main box, again to create a solid object look.
Later the left and right wall of the box are filled with colors.(Values shown in image.)
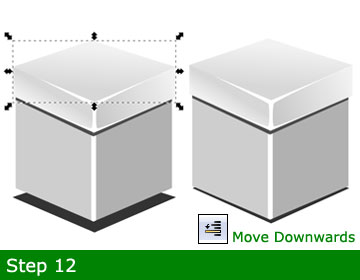
Simply the toppest object is duplicated and moved downwards underneath the whole box and filled with dark gray color. To move and place the object precisely you can use Arrow keys + Alt.
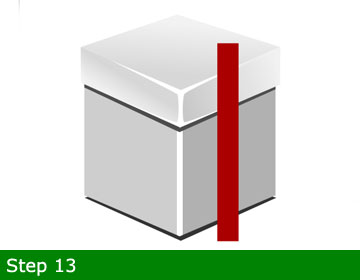
Lets create the Giftpack ribbons to fasten it. A rectangular strip is created and filled with aa0000ff color.
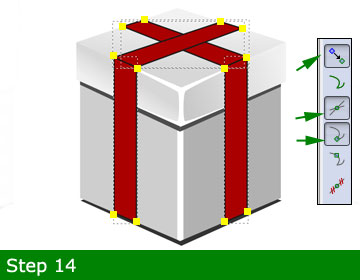
Now we created three duplicates of the red ribbon strip and converted to Object to path and manipulated the shapes individually as shown using Move nodes tool.
To enable the node snapping, buttons are displayed for help.
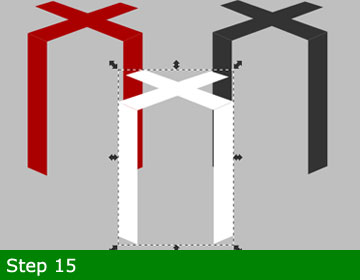
Later we grouped the whole ribbon object and duplicated 2 times. Filled with colors as shown.White for highlight and darkone for shadow effect.
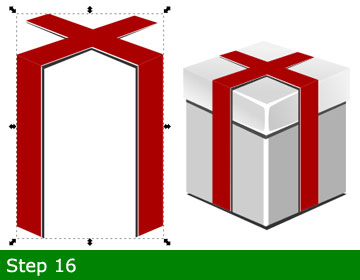
Now the ribbon object shape, highlights and shadows are placed underneath main ribbon using the move step downward tool as shown. Then we placed it back on our Gift Box container.
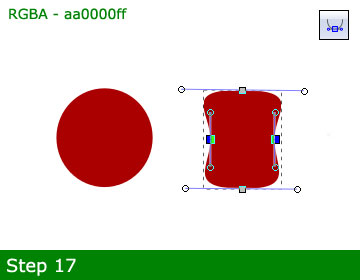
Now lets create the Bow object to make it more attractive. A simple circle object converted to Path and manipulated as shown.
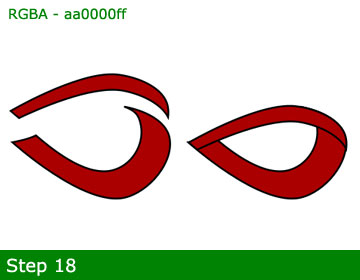
Then we made the bow loop shape as shown. They are two different objects placed together seamlessly.
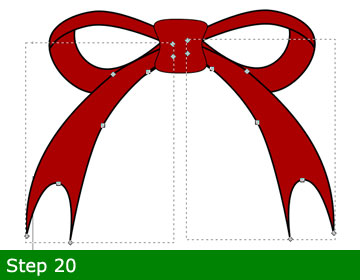
Adding more shapes to bow object to complete it and make it beautiful. Remove the strokes for the whole object as displayed later.
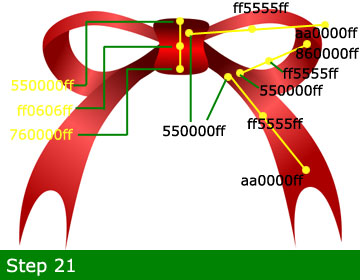
Here comes the fun part but will be tricky to do. We have filled gradients in all of the bow internal individual shapes. You can see the color values used and the direction of gradients filled. For the left side you can simply duplicate the right side and flip Horizontal pressing H.
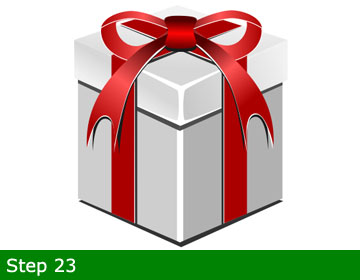
Here is the final Giftpack box. Notice we have added a shadow shape to the bow object also and the white hightlight shapes like we did earlier.
Please comment whether if you find the tutorial informative and useful and share with people fond of Graphic designs. Thanks for reading and following the tutorial.


Post a Comment